In this section we will learn how to use Forecast Pro’s Excel Collaboration capabilities to allow members of your team to view and make adjustments to your Forecast Pro forecasts in Excel which can then be imported back into your Forecast Pro project.
Excel Collaboration in Forecast Pro provides a video overview of Excel collaboration. Alternatively, proceed with the written lesson below.
The lesson will walk through a sample collaborative process where four salespeople will review and modify the Forecast Pro forecasts in Excel. The process consists of the following four steps:
Step one: Generate the baseline forecasts in Forecast Pro.
Step two: Use Forecast Pro’s Excel Collaboration Manager to create four collaboration spreadsheets—one for each salesperson.
Step three: Distribute the collaboration spreadsheets to the salespeople and have them review and make changes in Excel using the Forecast Pro Excel Add-in.
Step four: Use Forecast Pro’s Excel Collaboration Manager to import the revised collaboration spreadsheets back into Forecast Pro.
Let’s get started.
STEP ONE: Generate the baseline forecasts.
We’ll begin this lesson by generating a forecast for the cakes and muffins data that we have explored in prior lessons.
Click on the “New Project” icon to go to the Forecast Pro main window.
Make sure you are on the Home tab and click the Data Manager icon.
Click the Add drop-down on the Historic Data row, select Excel and select 123 Bakery – Historic Data.xlsx to add it to the Historic Data row.
Click the Add drop-down on the Filters row, select Excel and select 123 Bakery – Filters.xlsx to add it to the Filters row. The Filters file includes a Sales Rep column which shows the sales representative assigned to each SKU. There are four sales representatives—Pedro Martinez, Aly Raisman, Nancy Kerrigan and Daisuke Matsuzaka.
Your Data Manager should now match the one below.

Click the Read & Forecast button to read in the historic demand data and generate the statistical forecasts.
Click the Exit button to exit the Data Manager.
Move the cursor to the Navigator and right click to bring up the Navigator’s context menu. Select Expand All.

Notice that we now have generated our baseline forecasts.
STEP TWO: Create the collaboration spreadsheets.
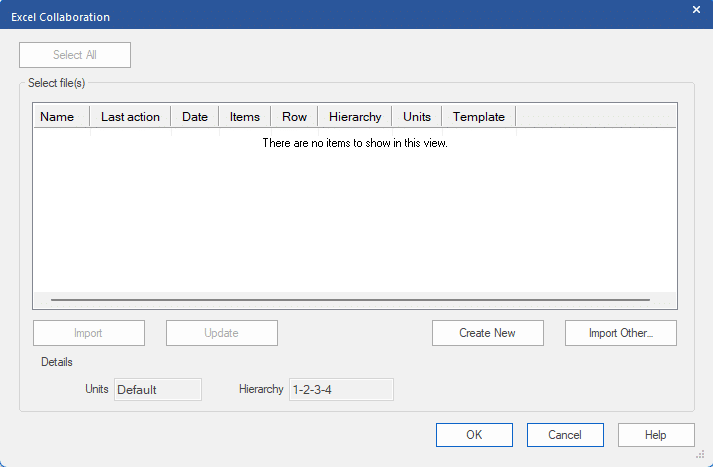
It’s now time to create the Forecast Pro Collaboration Worksheets to send to the all-star sales team members. On the Home tab, click the Excel Collaboration icon to open the Excel Collaboration Manager dialog.
Click the Create New button to open the Create dialog box.

At the top of the dialog is a textbox labeled Export to. This is where Forecast Pro will save the exported Forecast Pro Collaboration worksheets. For this lesson we’ll use the default setting.
Next, we need to define the data to export. Forecast Pro allows you to make overrides at any level of the hierarchy, however, each collaboration spreadsheet you generate will be for a specific hierarchy level. In our example, we want the salespeople to review the SKU-level forecasts, so make sure that SKU is selected in the Hierarchy level drop-down.
If you are using Multi-row Override mode, Forecast Pro also needs to know which override row should be used when the collaboration spreadsheet is imported back into the project. The Override row drop-down lists all available override rows as well as a row that is not currently shown in the override grid—Excel Collaboration.
Recall that when working with override rows, if there are multiple overrides for the same item and forecast period, the override row that is lowest in the grid is used in the final forecast. The Excel Collaboration row always appears as the final override row and thus takes precedence over all other override rows. Therefore, if your collaboration spreadsheets import into the Excel Collaboration row, it guarantees that the overrides imported from the collaboration spreadsheets will be used in the final forecast. This example will use Standard mode so choosing the override row is not relevant.
Next you need to tell Forecast Pro how many historical and forecast periods you want to include in the collaboration spreadsheet. Including some historical sales along with the forecasts can be useful. Let’s include the final three months of historical demand in our collaboration spreadsheets. To do so, use the spinner on the first date box to change the value from “1” to “-3.” Note that the corresponding month is shown right above the spinner.
Finally, we need to select which items we want to export to our collaboration spreadsheets. Select Filtered – multiple files. This option allows you to create separate collaboration spreadsheets based on the value of a filter field that you select. In our example, we will use the Sales Rep filter to generate a separate file for each salesperson. Three of our salespeople want to use the In Place template and the fourth prefers the By Selection template.
Notice that the drop-down to the right of Filtered – multiple files is now available. The drop-down displays all of the currently available filers. Select Sales Rep. Notice the Value(s) drop-down is now available. This drop-down allows us to specify which filter values we want to create Forecast Pro Collaboration spreadsheets for. Use the drop-down to specify the first salesperson (Aly Raisman). Click the Select All button and notice that all four salespeople are now selected. Click the Create button and move the Create dialog box so you can see the Excel Collaboration Manager.

When we clicked Create, Forecast Pro generated the three collaboration spreadsheets we requested using a standard file naming convention and listed them on the Excel Collaboration Manager dialog box. The files have been saved to the Export directory listed at the top of the Create dialog box and Forecast Pro has associated these collaboration spreadsheets with the Forecast Pro project. These files may be updated with the most recent data and forecasts by simply selecting the file(s) in the list box and clicking Update.
Click the Exit button to close the Create dialog box. Leave the Excel Collaboration Manager open.
STEP THREE: Make changes in Excel.
If this were a real forecasting session, you would now save your Forecast Pro project and alert the salespeople that their collaboration spreadsheets are ready for review. After the review is complete, you would reopen your project and import the changes they made in Excel into the Forecast Pro project.
For our lesson we will simulate this process, but we will launch Excel from within Forecast Pro to demonstrate some of the Excel Collaboration Manager’s functionality.
In the existing sheets section of the Excel Collaboration Manager select the spreadsheet for Nancy Kerrigan right click to bring up the context menu and select Open in Excel. This will launch Excel and open the spreadsheet. Your Excel screen should now match the one below.

The Forecast Pro Collaboration Worksheet includes all items assigned to Nancy Kerrigan. The 3 months of historical sales are shown in the grey columns with the 12 monthly forecasts to the right. Click on a value on row 8. Notice the graph updates to display the item in the row currently selected in Excel.
Now let’s take on Nancy’s role and make some changes. Suppose that Food-King has told Nancy they are running a promotion for BU-20-02 in September and she wants to increase the forecast and document the changes with a comment. Select the September cell and type in “30000.” Notice that the cell is now orange to show that changes have been made.
Select the Forecast Pro tab to show the Forecast Pro ribbon items.

Select the September 2023 forecast cell for BU-20-02 (J3) again and click the Insert/Edit Comment icon on the Forecast Pro tab.

Enter “Raised for a planned promotion” and click the OK button. Notice that there is now a red triangle in the upper right-hand corner of the cell. If you hover over the cell, you will see the comment.
Feel free to make additional changes to the forecasts to experiment with how the interface works. When you are done making changes, save the workbook and exit Excel.
Return to Forecast Pro. Exit the Excel Collaboration Manager and then reopen it using the Excel Collaboration icon (this will refresh the displayed information).

Notice that the Last action field for Nancy’s spreadsheet now displays “Modified externally.” Forecast Pro has noticed that changes have been made to the spreadsheet and has updated its status accordingly.
Feel free to make additional changes to the forecasts to experiment with how the interface works. When you are done making changes, save the workbook and exit Excel.
STEP FOUR: Import the overrides into Forecast Pro.
Return to Forecast Pro, reopen the Excel Collaboration Manager.
The Last action column displays the status for all collaboration spreadsheets associated with the project. Notice that since we did not modify the spreadsheets for Aly, Nancy, and Daisuke they display “Created in FP,” while the spreadsheet for Nancy displays “Modified externally.”
Select the spreadsheet for Nancy and click the Import button to import the overrides into your project. Note, if multiple spreadsheets needs to be imported you can highlight more than one by holding the [Ctrl] and [Shift] keys when clicking or using the Select All button. After importing the Excel Collaboration file, its Last Action status is updated to “Imported into FP.”
Exit the Excel Collaboration Manager and select Total>Cakes>Food-King>BU-20-02 on the Navigator to view the imported override(s) and comment(s) you made in Excel.

Explore these items and verify that the overrides were imported as expected.
Exit Forecast Pro.